


Learn how to customize the way Odoo presents information to users in an upgrade safe way. This is a common technique to make sure the most important things are found quickly when users are looking for or updating Documents. A very basic working knowledge of Odoo is assumed.
Before you continue:
If you follow along with the steps using your own system, please make sure you are logged in as a user who is a member of the Technical Features and Administration / Settings groups. You can check this on the Access Rights tab of the User Document. Please also make sure you have installed the Explode Technical Menu module (Navigate to Settings –> Modules –> Apps and search for Explode).
Models
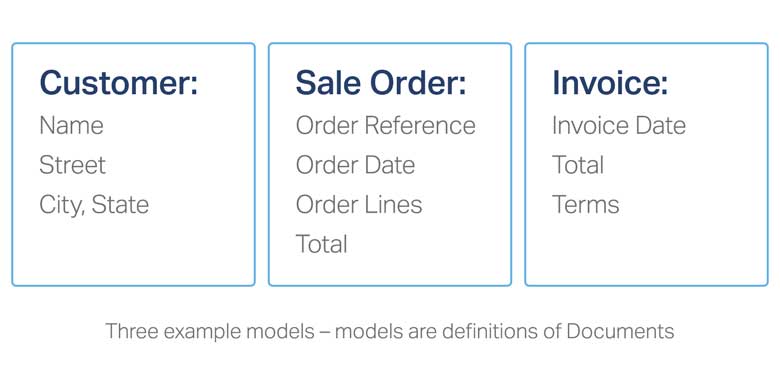
A model is a definition for a certain group of information that represents something in your business or organization. There is a model for Customers, one for Invoices and one for Sales Orders. Each model defines what is shown and stored on the documents for that model.
Documents:
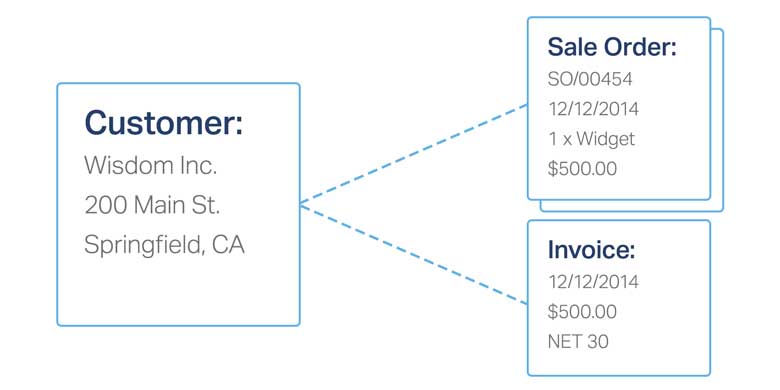
Odoo allows you to create, store and update documents to support your business. For every customer, you have an associated Customer document that records their name, contact information and other details. Odoo can link Sales documents and Invoice documents to the Customer document to help you find them quickly when you need them. Every document is stored in the database, and shown to you via a view when you ask to see it.
Views:
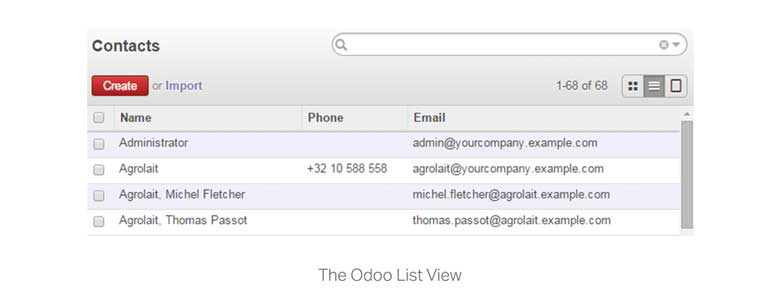
A view is the way Odoo presents information. Common view types include the Kanban view, the List view and the Form view. The Kanban view and List view both show multiple documents at a time, while the Form view presents a single document at a time. The List view is also called the Tree view.
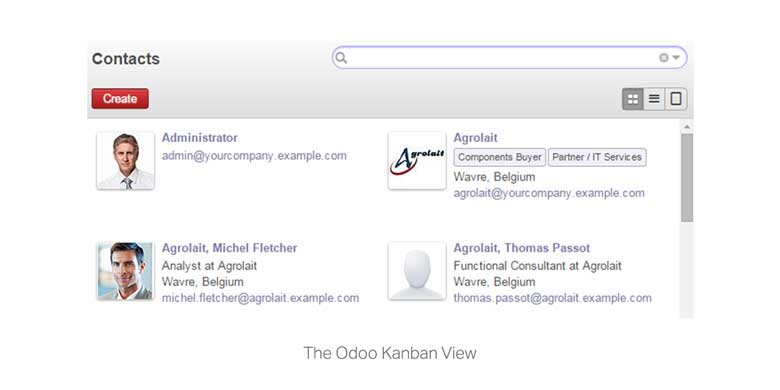
The Odoo Kanban View

The Odoo List view
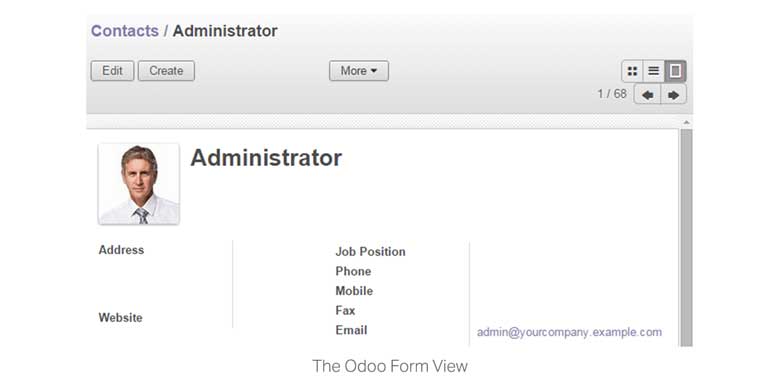
The Odoo Form view
Views are defined with XML. When a database is first created, the XML is loaded from files on the server and stored inside the database. Although you can make changes to the XML by editing the view document, once you upgrade your system these changes will be lost. The XML is re-loaded from the same files on the server and the edits you made are wiped out.
To make changes that are not replaced during an upgrade, you need to create your own views. You can do this via your own modules, or can do this by creating a view interactively, just like you create any other document in Odoo.
Step 1:
Determine the name of the view you want to modify. You won’t actual modify this view. You will create your own view that ‘inherits’ this one, and contains just your changes. When the system is upgraded, only the view you inherited changes (is reloaded), not yours.
We are going to add the country to the List View of Contacts. You can see this view when you navigate to the Messaging > Organizer > Contacts menu (with the Address Book module installed). By default, it does not show the Country of each Contact.
To add Country to this view, we need to find out which view this is and how to specify we want Country information shown.

A good way to work out which view you want to modify is to use the Developer Mode. You enter the developer mode (if you have permission) by clicking the arrow next to your username (located in the top right corner of the window), selecting the About Odoo option from the dropdown menu, and then clicking Activate the Developer Modefrom the popup window that appears.
From the Debug dropdown that the Developer Mode added to the top left corner of the view (Above the Create button), select Manage Views.
The popup window that appears tells us that there is only one treeview defined for this model (res.partner) and that the name for the view we want to inherit is res.partner.tree. Remember, the List view is also called the Tree view.
Step 2:
Work out the database name of whatever you want to add to the view. The Developer Mode also comes in handy here, since you can just hover over the label of the piece of information you want to show and read the database name from the black popup that appears. You can’t hover over anything in the List view, so switch to the Form view to do this.
Open a Contact in Form view and click Edit so you can see the boxes that contain the information, as well as the labels next to them.
There is no label for Country. You can get the same information when there is no label by hovering over the box where that information goes.
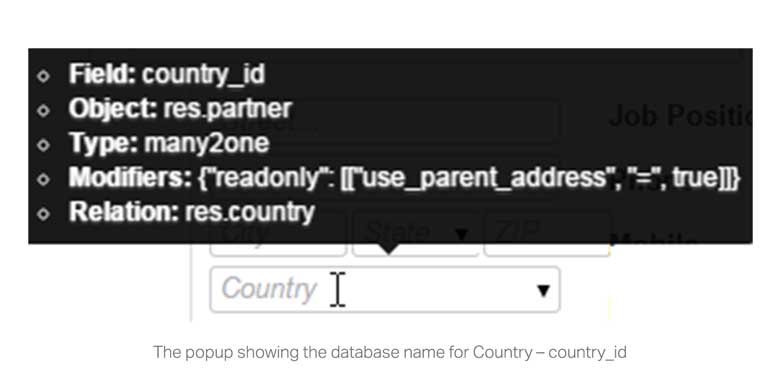
What you see is actually the field name from the database that stores the information typed into the box. Once you have the field name of the field you want to add, and the field name of
Step 3:
Find the view you want to inherit. Navigate to Technical > User Interface > Views, enter res.partner.tree into the search box and hit Enter to apply the search to the View field.
If you have no other modules installed that change the res.partner.tree view you should see only one document shown in the List view. Open it. You will see the way this view is defined, as a series of fields – some of which are invisible.
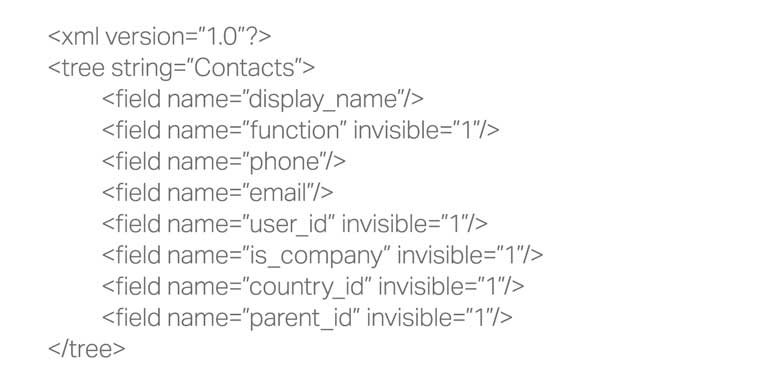
Notice that the country_id field is already part of this view! It is just invisible. In the next step we will change this.
Step 4:
Duplicate the view to create your own, and include your changes. From the More menu, select Duplicate to create a copy of this view.
Change the View Name so it is different from the view you are inheriting, then click Save. This step is important, because without saving, your view has the same name as the view you inherited. Once this is done you need to fill in the Inherited View to be res.partner.tree. This tells Odoo that the current view will inherit the res.partner.tree view and make changes to it. This is an upgrade safe view that will never be reloaded.
The XML that defines changes to a view is a little different to the XML that defines a view. Usually you want to add a field to a view, remove a field from a view, or change something about a field already in a view.
To add a new field, you need to pick an anchor field, then specify if your field gets added before or after the anchor field.
To place field_new before field_current, enter:
<field name="field_current" position="before"> <field name="field_new"></field> </field>
To place field_new after field_current, enter:
<field name="field_current" position="before"> <field name="field_new"></field> </field>
To remove field_current, enter:
<field name="field_current" position="replace"> </field>
Note that it is much safer to hide a field than to remove it, because the system may be counting on that field being in the view for a variety of reasons. It is better to make a field you don’t want invisible. We do this by changing the field properties.
To change the properties of a field, you use the attributes position and then define the name and value of the attribute you want to change.
To change the visibility of field_current, enter:
<field name="field_current" position="attributes"> <attribute name="invisible">0</attribute> </field>
To change the label of field_current, enter:
View XML will be covered more in another post, so for now you can use this snippet for the XML. It instructs Odoo to make the country_id field visible instead of invisible.
<field name="company_id" position="attributes"> <attribute name="invisible">0</attribute> </field>
When you save this view and click again on Messaging > Organizer > Contacts you should now see Country is now visible.

Wrap Up:
In this post, we detailed how to make upgrade safe changes to views. We listed some common changes – adding fields, hiding fields and changing field labels. Doing this helps ensure important things are found quickly when users are looking for Documents, reading them or updating them.
Get more familiar with the XML syntax by examining the structure of existing views in Odoo. You can also see examples of where more than one view inherits and changes the original. The order in which changes are made is controlled by the sequence. Changes from a view with a lower sequence are applied before a view with a higher sequence. If your changes don’t see to be working, it might be worthwhile checking to see if there is a view on the same model with a higher sequence!
Final Tip:
While you are experimenting, if you make a mistake and get an error, simply delete your view and try again. If you accidentally delete the original Odoo view, just upgrade your database (you can do this by clicking upgrade on the hidden base module) to reload the original XML.


